Connecting a DigitalOcean S3 Service
DigitalOcean, like many other cloud providers, offers a paid S3 (Spaces Object Storage) service with broad configuration options.
The goal of this configuration is to connect external storage for backups of the selected SHIPOPS cluster.
The following example shows how to create an S3 service.
Step 1. Create the service
Create an S3 service and, for this example, leave the default settings: standard storage without CDN. Select a region that should preferably match the region where the servers are rented.
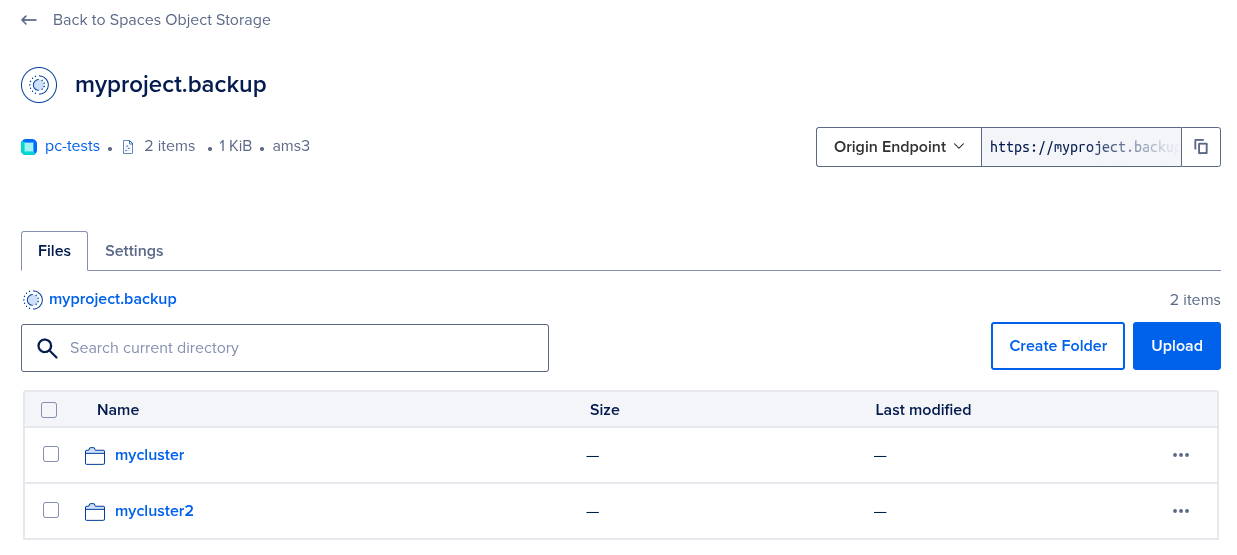
Set a bucket name (Spaces Bucket). For example: myproject.backup. This is the first parameter required for backup configuration. The same name will be displayed in the DigitalOcean web interface as the name of the created S3 service.
After creating the S3 service, you will receive the second parameter for backup configuration: the URL, which DigitalOcean calls Origin Endpoint. In this example, it is https://myproject.backup.ams3.digitaloceanspaces.com.
Step 2. Organize folders
In the DigitalOcean web interface, S3 is presented as a filesystem folder. Therefore, you can use either the root folder or nested folders. If you plan to organize storage by folders, first create a folder:
We recommend using one bucket for each SHIPOPS VPC and creating a separate folder for each cluster inside the VPC. For this example:
If desired, you can use one bucket for the entire project and separate VPCs by folder to save money.
When configuring backups, it is important to include the folder that will be used for cluster backups in the URL. For example, for the clusters mycluster and mycluster2, create folders with the same names: mycluster and mycluster2. Then the URL in the cluster settings should be https://myproject.backup.ams3.digitaloceanspaces.com/mycluster for mycluster and https://myproject.backup.ams3.digitaloceanspaces.com/mycluster2 for mycluster2.
Step 3. Grant access
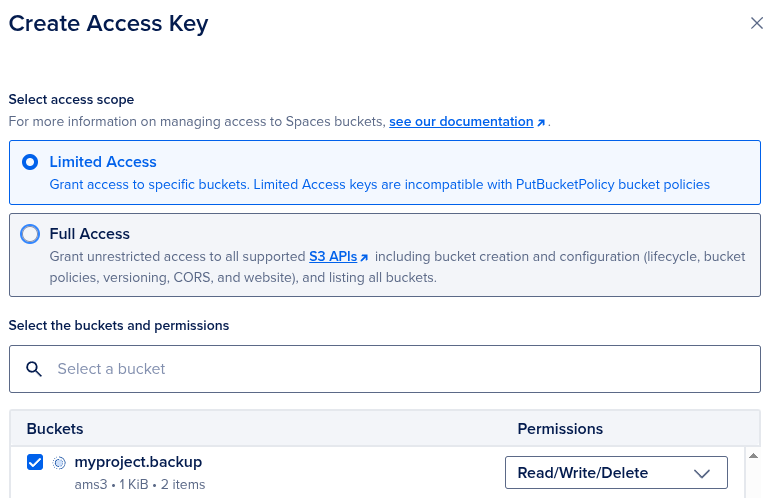
Now grant SHIPOPS write access to this storage. To do this, create an access key with Read/Write/Delete permissions:
In this example, set the key name to key-for-s3-myproject.backup instead of using the default name. After creation, the required connection credentials will be available on the Settings tab, which the web interface opens immediately after creating the key:
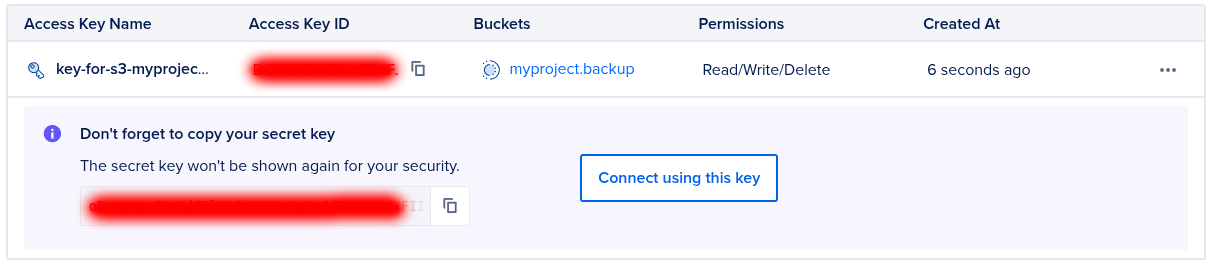
The secret must be copied and saved immediately, as the web interface warns. Otherwise, you will have to create the key again.
The missing key and secret values are now known. In the Key field of the SHIPOPS web interface, enter the Access Key ID value.